Point attributes
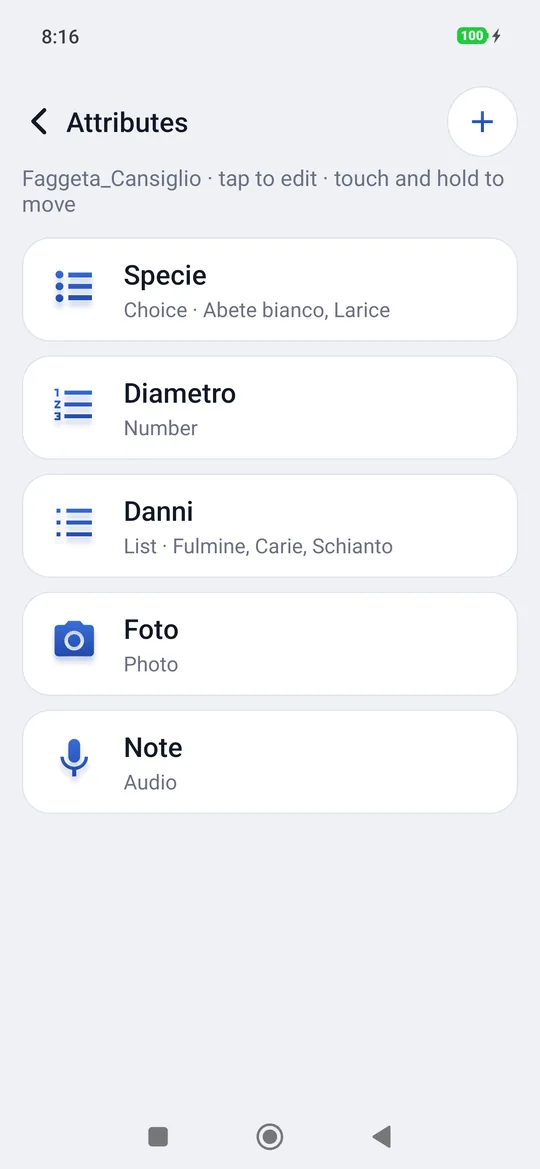
Name and code are enough for a stake, not for a tree. The attributes are the items you want to record on every point of a project: the species, the diameter, the damage, a photo, a voice note. You prepare them once per project and geosit asks for them after every measurement, already filled in with the values of the previous point: on a hundred identical beeches you only change the diameter.
The GIS package is needed
Attributes are the GIS package, added on top of basic geosit: the license says which packages there are (Settings → License, Packages row). During the trial days there is everything. Without the package the forms already filled in can always be seen and exported, but attributes cannot be created or changed and the form does not open by itself after the measurement. One photo per point is included in Base too: in the point card (Edit) the Photo item has Shoot and Gallery, and in the export it becomes the Photo column.
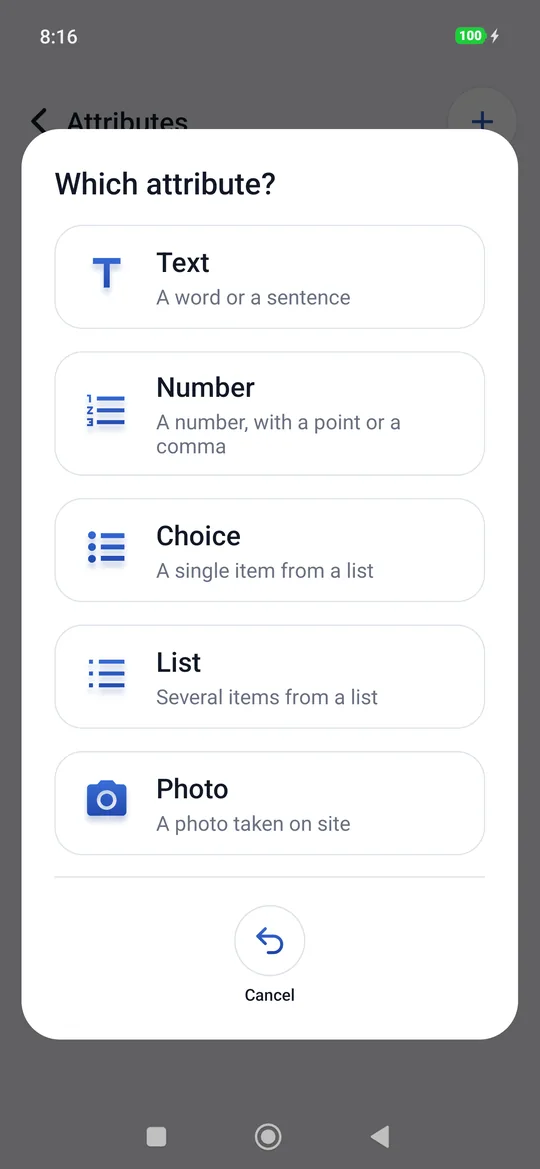
The seven types
| Type | What you write | Example |
|---|---|---|
| Text | A word or a sentence | Field notes: “forked trunk” |
| Number | A number, with a point or a comma | Diameter: 32.5 |
| Choice | A single item from a list | Species: Beech, Silver fir, Larch… |
| List | Several items from a list, with checkboxes | Damage: Lightning, Rot, Windthrow |
| Photo | A photo taken on site (or picked from the gallery) | Photo of the trunk |
| Audio | A voice recording | Dictated Notes |
| Video | A video recorded on site (or picked from the gallery) | Video of the crown |
Where they are prepared
The Attributes screen of a project opens from three places:
- Project → touch and hold on the project → Attributes;
- in the survey, the attributes chip in the sheet (5 attributes);
- in the point card, the Attributes button.
This way a missing attribute can be added even in the field, halfway through the job.
Creating an attribute
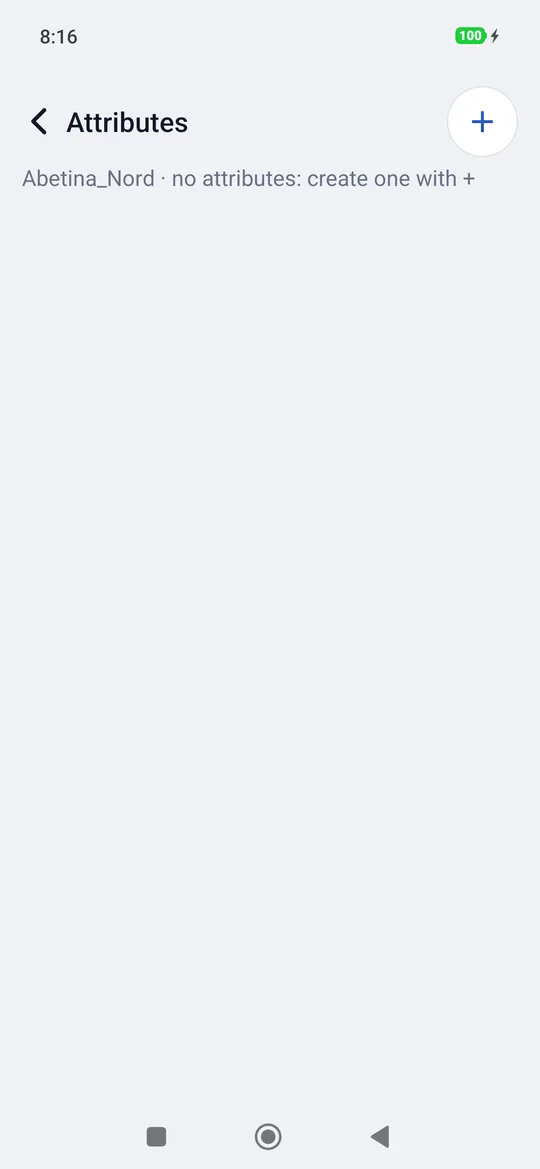
- Tap the + at the top right (if other projects have attributes, choose New attribute).
- Choose the type in Which attribute?
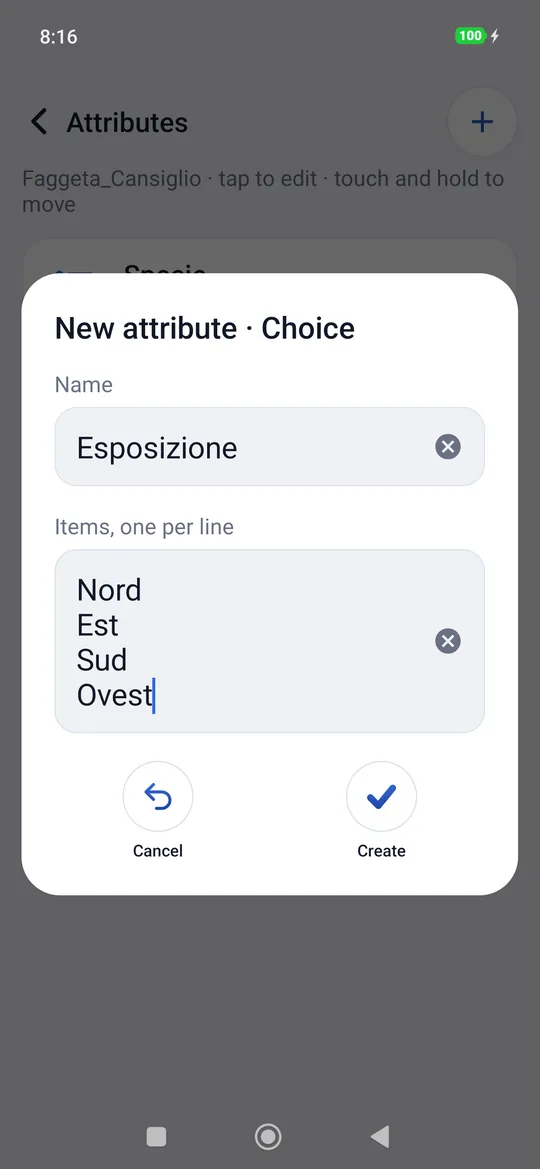
- Write the Name (for example Species). For Choice and List also write the Items, one per line.
- Tap Create.
The rules:
- every attribute must have a name, and two attributes of the same project cannot have the same name (Name already used);
- Choice and List need at least one item (Items are needed); empty lines and repeated items are removed automatically.
Editing, moving, deleting
- A tap on an attribute opens it: you change the name and the items, then Save. The type cannot be changed: to change it you create a new attribute.
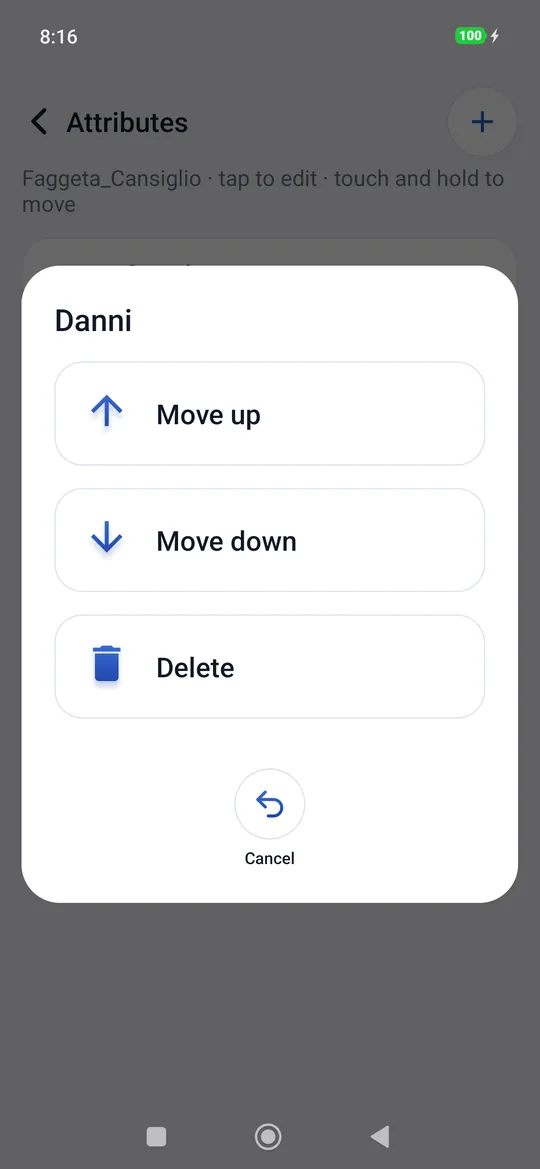
- A touch and hold opens Move up, Move down and Delete. The order of the attributes is the one in which they appear in the point card and in the export columns.
- Delete removes the attribute and the values the points have for it (with the photos, audio and videos). This can't be undone.
A removed item does not disappear from the points
If you remove an item from a list, the points that had it ticked keep it, and in their card it stays visible and ticked.
Copying the attributes from another project
If other projects have attributes, the + also offers From a project…: you choose a project that already has attributes and geosit copies names, types and items (not the values of the points). Attributes that already exist with the same name are not touched: 3 attributes copied, or No new attributes: they were all already there.
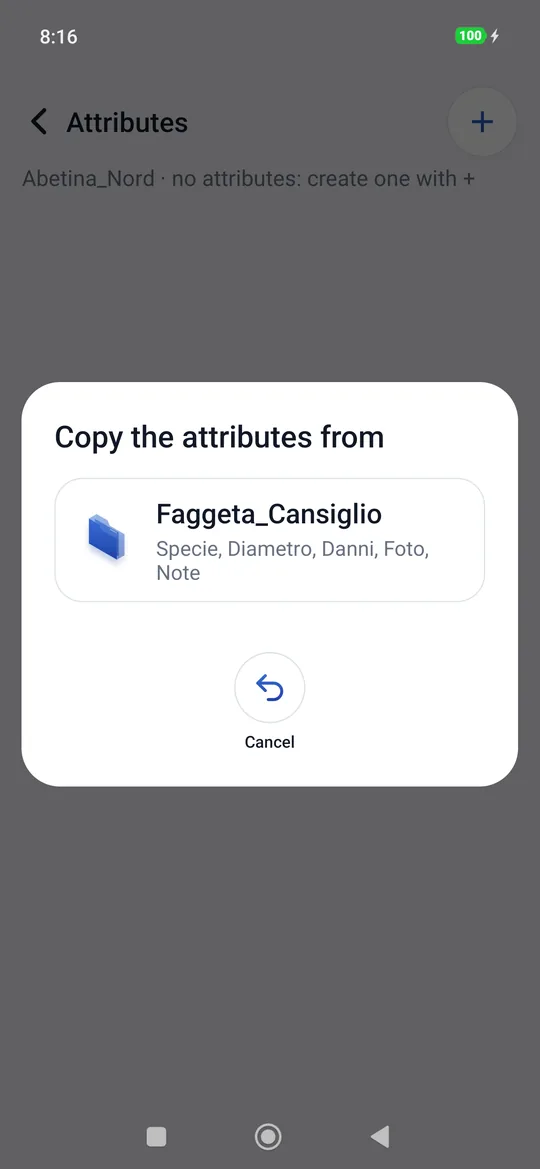
The button appears only if another project has attributes to copy.
Filling in the point card
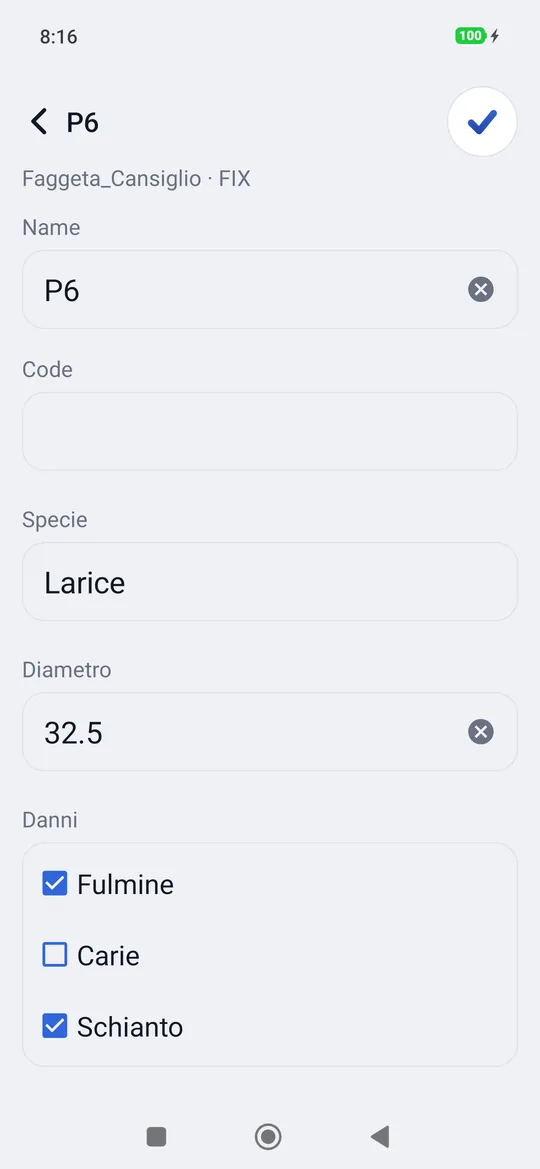
If the project has attributes, after every measurement (and after a point entered manually) the card of the point just saved opens: at the top Name and Code, below them a field for each attribute, in the chosen order. The same card opens at any time with Edit from the point card.
| Type | How to fill it in |
|---|---|
| Text, Number | You write in the field. The number can be written either way, 32,5 or 32.5. |
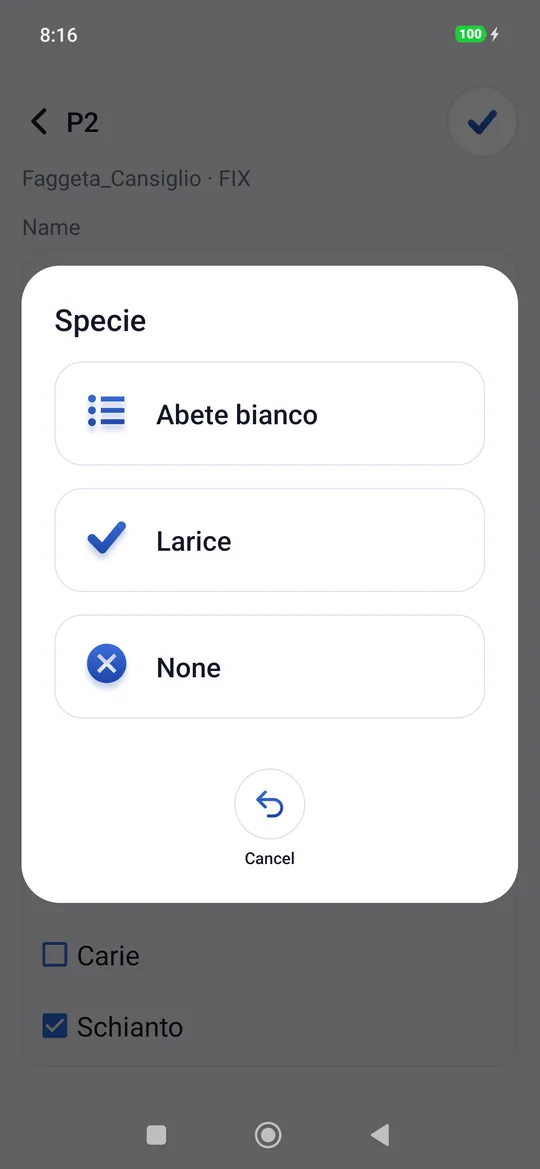
| Choice | A tap on the field (Choose ›) opens the items. None empties the field. |
| List | You tick the checkboxes; more than one at a time. |
| Photo | Shoot opens the camera; Gallery picks a photo already taken. |
| Audio | Record opens the recorder: the time runs, Save stops and keeps the recording, Cancel throws it away. |
| Video | Record opens the camera in video mode; Gallery picks a video already recorded. |
When a photo, an audio or a video is already there, the card shows it (the photo as a preview, the audio with Listen, the video with Watch) with Redo and Delete. A tap on the preview opens the full photo.
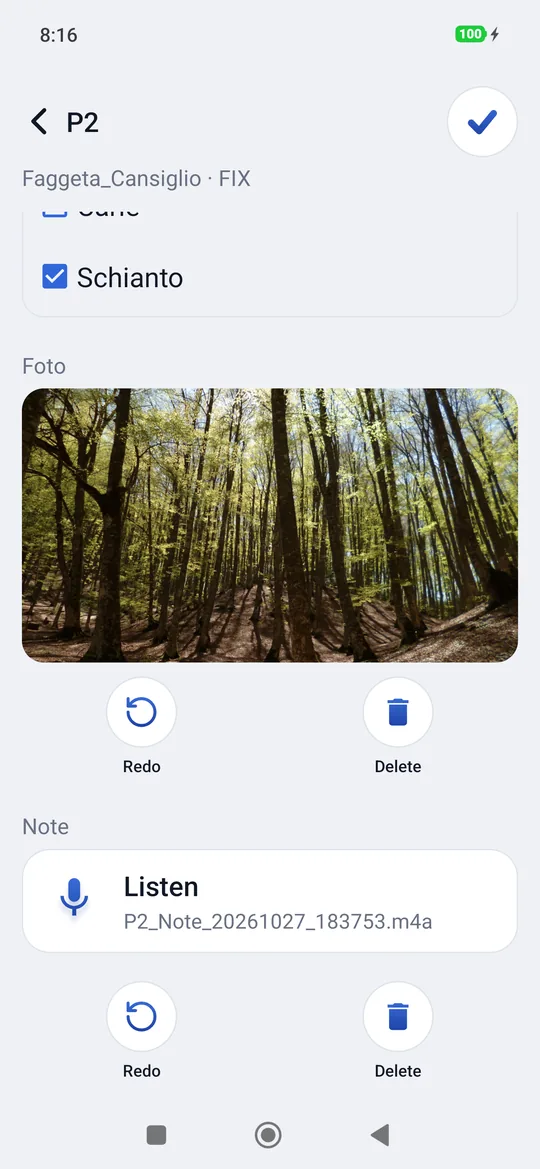
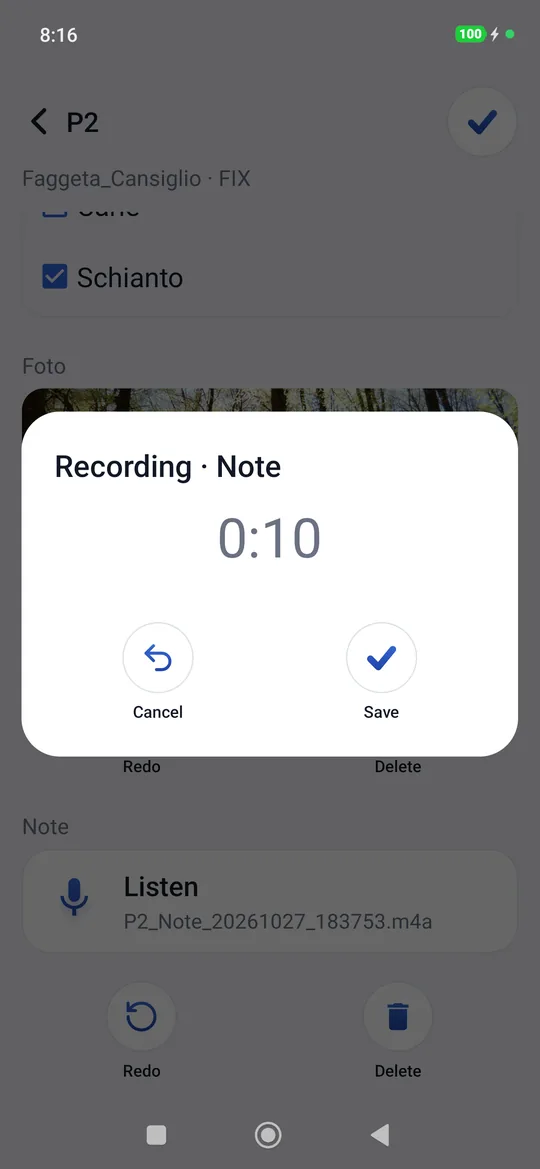
The Done tick, at the top right, closes the card and goes back to the map, ready for the next point. The back button saves too. There are no commands at the bottom: attributes are created by long-pressing the project, under Attributes.
When it is saved
Choices, checkboxes, photos, audio and videos are saved immediately. Texts and numbers are saved when you leave the card (also when you open the camera). A badly written number stays in the field and on leaving geosit says so: Not a number — Diameter needs a number, for example 32 or 32.5.
The values of the previous point
The card of a new point comes already filled in with the values of the previous point (the last point of the project that has attributes filled in): species, diameter, damage, texts. Photos, audio and videos do not: those always belong to that point alone. You only change what is different.
The photos
- geosit reduces them to 2560 pixels on the long side and straightens them: twelve megapixels per tree would fill up the phone and the mailbox.
- In the photo data (EXIF) it writes the position of the point and its name: a photo program or a GIS places them on the map by itself.
- The file takes the name of point, attribute, date and time, for example
P6_Foto_20261026_090032.jpg: in the office you can tell what it is without opening it. - They show as thumbnails in the list of points, in the point card and on the map, above the point, once you zoom in far enough (the scale bar shows a few tens of meters); from further away, next to the point there is just the camera. In the corner of the thumbnail there is the camera, with the number if there is more than one photo; a tap on the thumbnail on the map opens the card. On the map thumbnails appear in survey, if the Photo thumbnails on the map switch in Settings is on; never in stakeout.
How they come out in the exports
| Format | The attributes |
|---|---|
| CSV | One column per attribute, at the end, in the project's order. A list has its items separated by \|; photos, audio and videos have the file path (allegati/P6_Foto_….jpg). If there are files, the CSV comes out in a zip with the allegati/ folder. |
| KML | In the data of each placemark (attribute table) and in the balloon. With photos a KMZ comes out that contains them: the balloon shows them. |
| DXF | It does not carry the attributes: only points and names, for CAD. |
| Shapefile, GeoPackage | One column per attribute, as in the CSV; photos, audio and video with the file path (allegati/…), but without the files. In the Shapefile column names are shortened to ten letters. |
And the other way round: when importing a CSV, the columns that have the name of an
attribute of the project (upper or lower case does not matter) become the values of that
attribute. So a CSV exported from geosit, corrected in the office and imported again, comes
back with its attributes. The items of a list are read separated by |; photos, audio and
videos do not travel inside a CSV. See Import and export.