Pro: lines and polygons by hand
With the Pro package a line or a polygon can be drawn on the map, without measuring and even without a receiver: a boundary taken from a DXF drawing, a fence between points already surveyed, an area to trace over a map. Then you correct them on the map, dragging the vertices with your finger. How to make a line by measuring is explained in the Survey.
Drawing never creates extra points
A point is born only when you create it (+ in the snap bar, or entering it manually) or when you measure it. Staking out a vertex or a line, moving a handle, snapping to a project point add nothing to the list of points.
Drawing with the snap
- In the survey tap the snap in the column on the right: the crosshair appears in the center and the snap bar at the bottom (see The snap crosshair).
- In the bar choose Line or Polygon.
- Move the map until the crosshair is where you want the first vertex: it snaps by itself to the project's points and to the notable points of the drawings.
- Tap + (Create): a point entered manually is born, with the purple diamond, and it is the first vertex. Repeat for the other vertices.
- When you have finished tap Finish (the check mark).
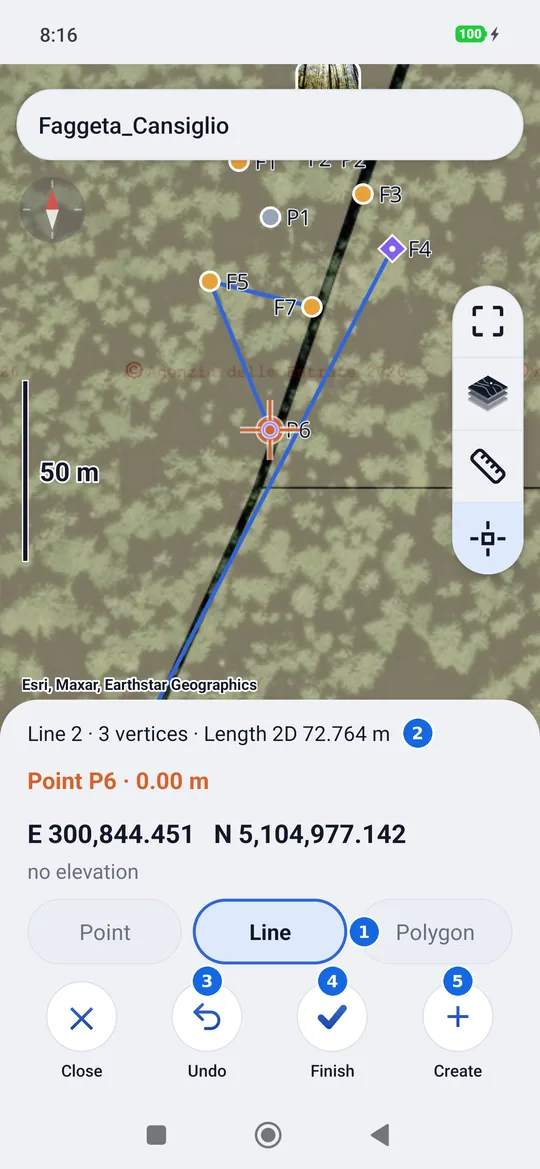
- Line or Polygon: what is being drawn.
- The live measurement: the number of the line, how many vertices and the 2D length (for the polygon the 2D area).
- Undo: removes the last vertex.
- Finish: ends the line; the next + starts a new one of the same type.
- +: a vertex under the crosshair.
- Undo appears from the first vertex, Finish from the second (from the third for the polygon).
- Undo on a vertex born with + also deletes the point; on a point that was already there (measured, imported, or tapped to make it a vertex) it only removes it from the line, and the point stays.
- Tapping a project point with Line or Polygon chosen makes that point the next vertex, with no duplicates: if it was in another line, it leaves it. + does the same with the crosshair snapped to a project point. A point that is already in the line opens its card instead.
- They can be mixed: vertices measured with the receiver, vertices taken from the drawings and points already surveyed in the same line.
- Even without the snap, with Line or Polygon chosen the points entered manually (long press on the map) become vertices of the current line.
The line's card
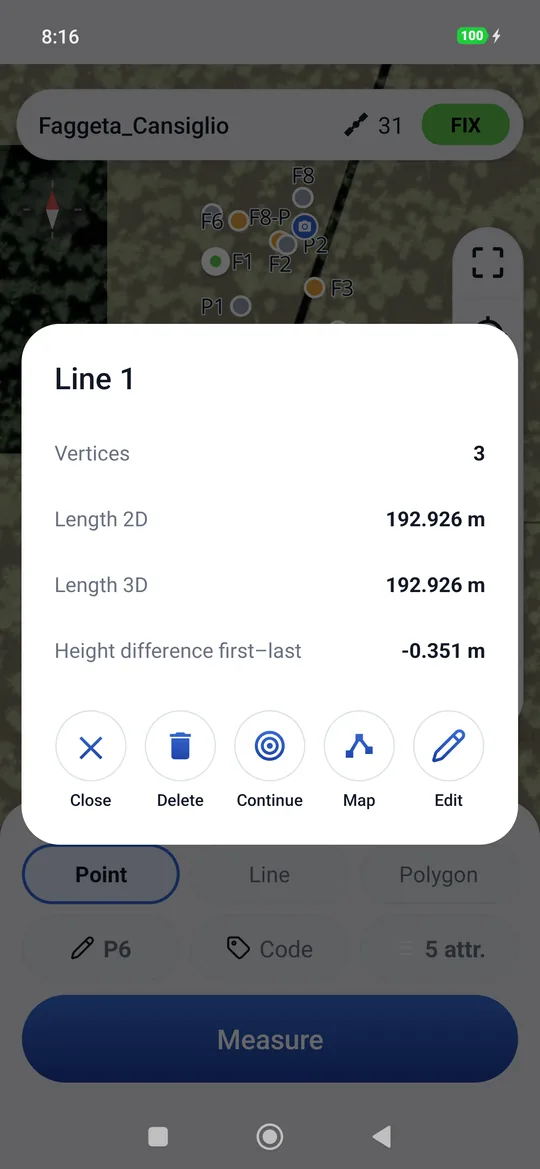
Tapping a line or a polygon on the map (with Point chosen) opens its card: vertices, 2D and 3D length, height difference between the first and the last; for the polygon area and perimeter in 2D and 3D. Below are the commands:
| Command | What it does |
|---|---|
| Continue | Resumes the line: the next vertices go at the end. |
| Map | Opens the editing on the map, see below. |
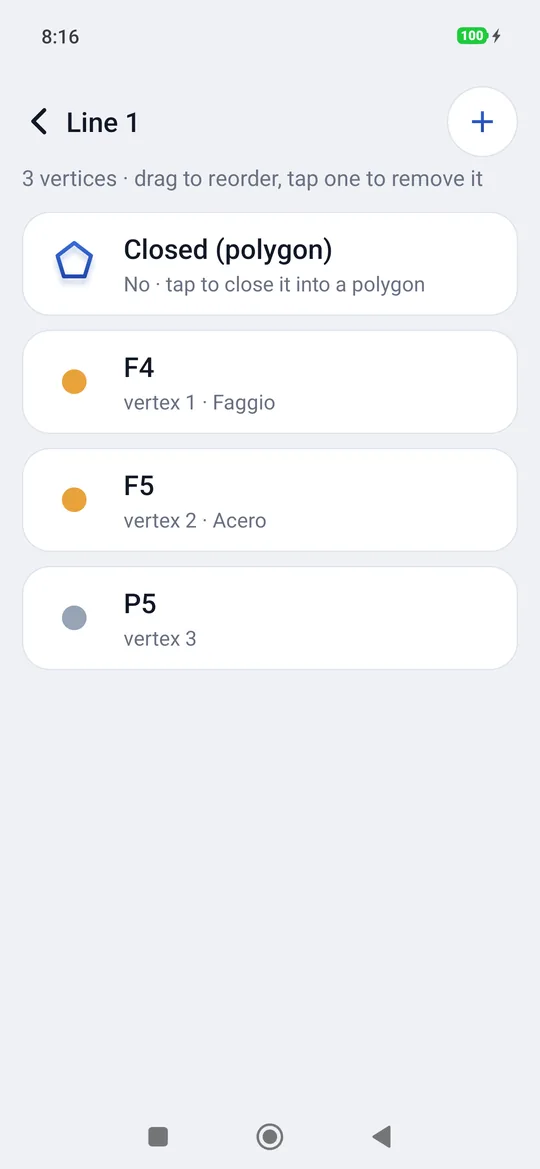
| Edit | The vertices in a list: they are reordered by dragging the rows, moved up and down, removed; + adds a point at the end, Closed (polygon) closes or reopens it. |
| Delete | Asks whether to keep the points, on their own, or delete them with the line. |
Correcting on the map
Map puts the line on the map with a handle on each vertex. Until you press Save nothing changes in the project: everything is provisional.
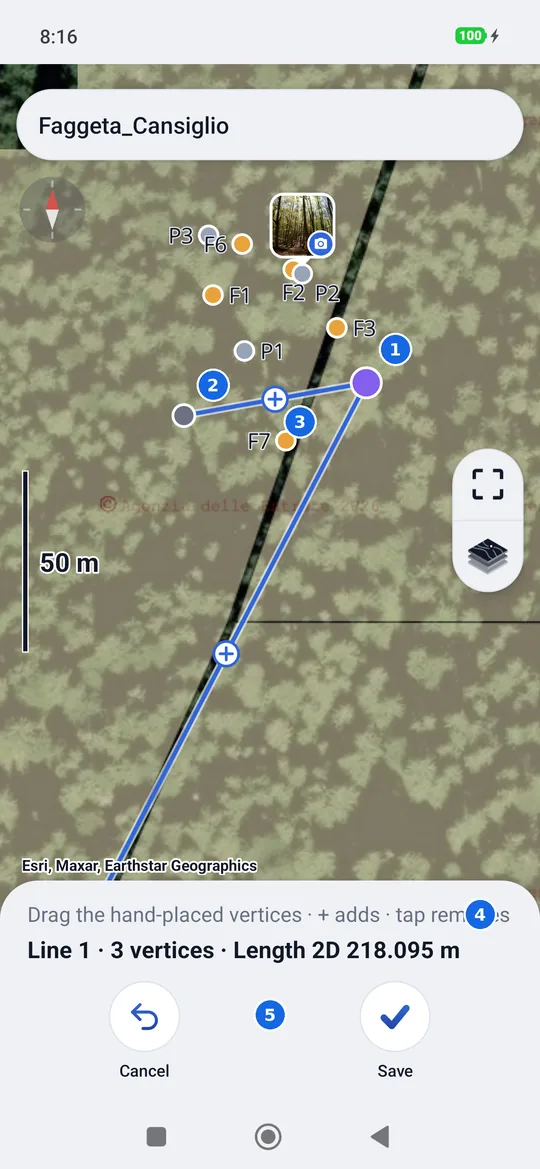
- A purple handle: a vertex entered manually, dragged with the finger.
- A gray handle: a measured point, it stays where it is.
- The + halfway along each segment: adds a vertex.
- The hint and the live measurement, which follows every move.
- Cancel on the left, Save on the right.
- Moving a vertex: keep your finger on the purple handle and drag it; the map stays still and the line is redrawn as you move. Near a project point or a notable point of a drawing the handle snaps.
- A measured point does not move: if you try, P5 is a measured point: it can't be moved appears. Its position comes from the receiver and geosit does not change it.
- Adding a vertex: tap the + halfway along a segment, or drag it where you need it. The new vertex becomes a point only when you press Save.
- Removing a vertex: a short tap on the handle. The point leaves the line and goes back to being a loose point of the project: it is not deleted. The line keeps at least two vertices, the polygon at least three.
- Leaving a handle on a project point makes it become that point: the point that was there enters the line, without creating one on top of it. The previous vertex stays where it was, as a loose point.
- Save writes everything together. Cancel (or the back button), if you changed something, asks Discard the changes?: Leave leaves the line as it was, Cancel takes you back to the editing.
Moving a point entered manually
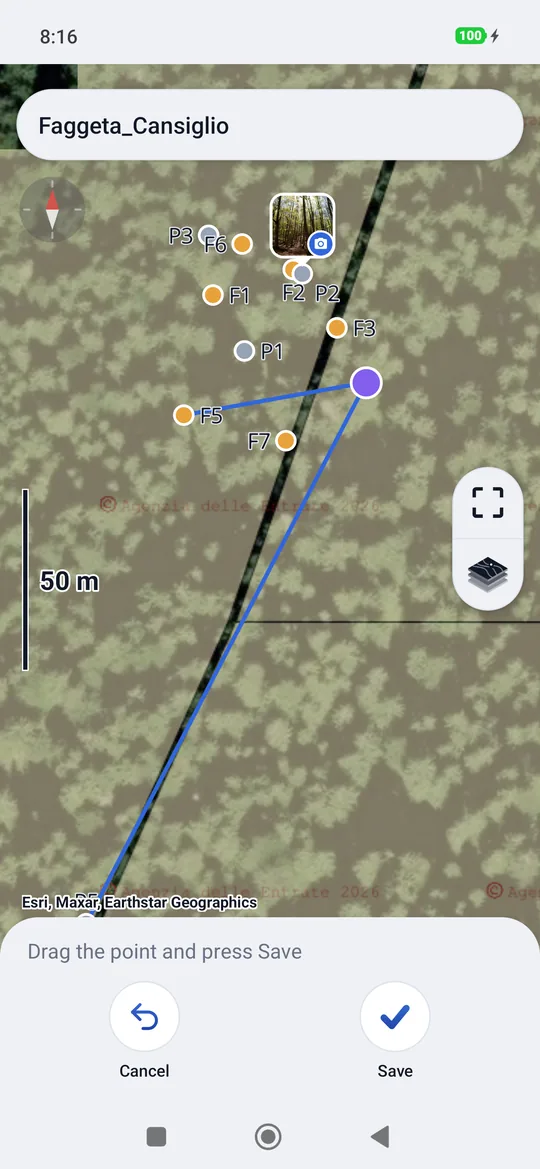
In the card of a point entered manually (purple diamond) there is Move: the point becomes a handle to drag, with the same snapping. Below it says Drag the point and press Save; Cancel leaves it where it was. Measured points have no Move.
Staking out a line
In the stakeout tapping a line makes it the target, also at fixed intervals: see Stakeout. There too the target is provisional: you stake out a vertex, a snapped point or a stake of the line without adding points; a point is born only when you measure.
In the export
Lines and polygons drawn by hand come out like the measured ones: DXF (layers LINEE and
POLIGONI), KML, Shapefile and GeoPackage (layers linee and poligoni). The vertices entered
manually are points without elevation, unless they took it from a drawing. See Import and export.