Receiver and corrections
Connecting the receiver
- Switch on the receiver and keep it close to the phone.
- On the Home tap Receiver. geosit starts searching right away: Looking for receivers switched on nearby…
- Tap the name of your receiver in the list.
The list shows only MS2 receivers: other nearby Bluetooth devices (headphones, plugs, computers) are not shown.
As soon as the connection succeeds, geosit goes back by itself to the previous screen, and satellites and solution appear in the capsule at the top.
The first time you connect an MS2, while geosit is in Demo mode, the window Start the trial? opens: with Start trial the 5-day trial starts and the MS2 connects, with Not now the MS2 does not connect. See The trial and the license.
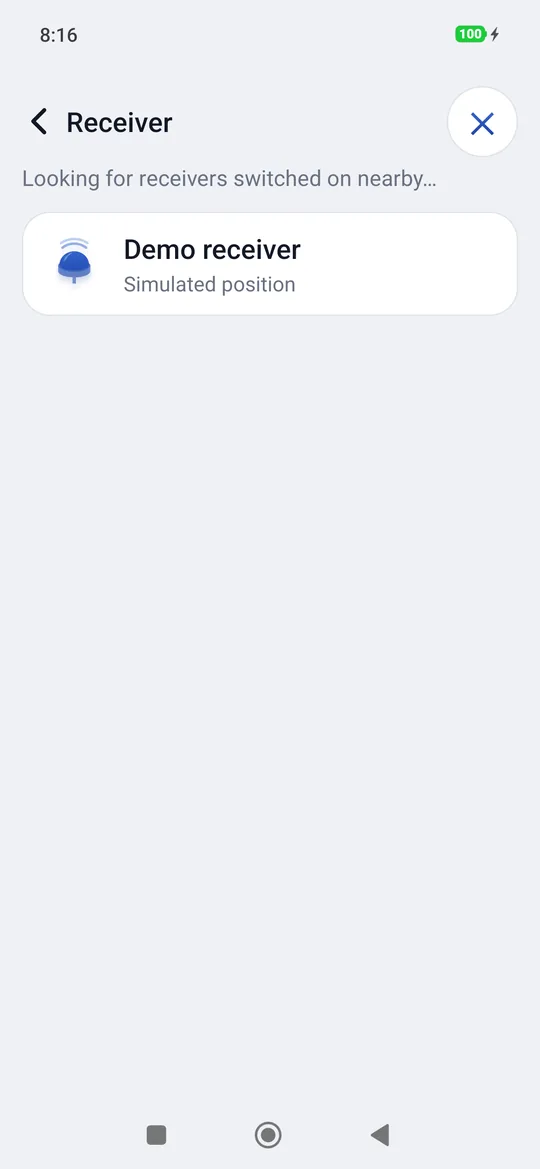
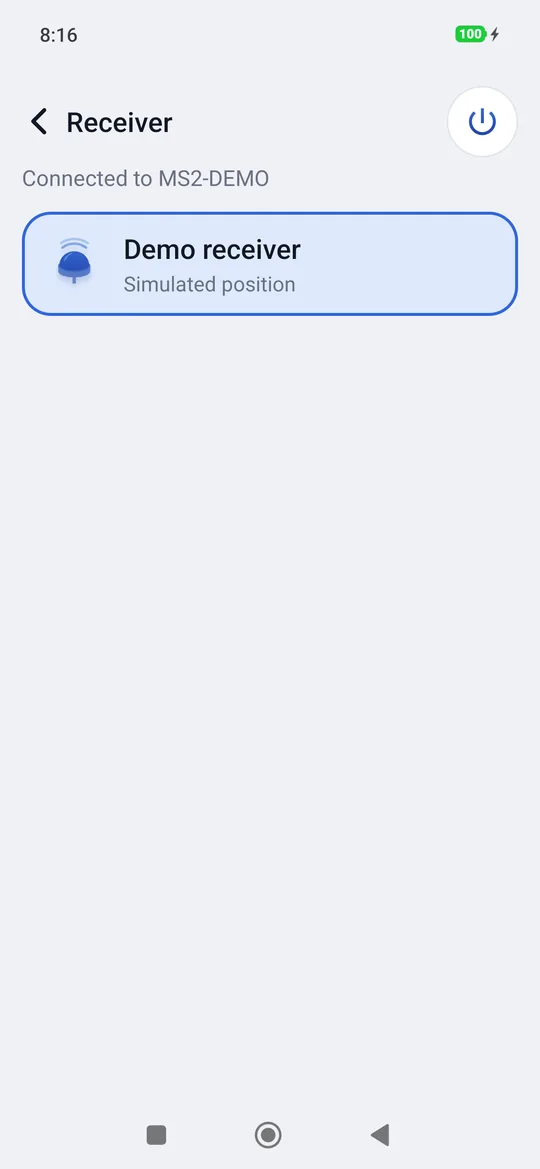
Every receiver found shows the connection type and its Bluetooth address under its name:
| Label | What it means | What happens when you tap it |
|---|---|---|
| Bluetooth LE | Receiver with the new firmware | It connects right away. |
| Classic Bluetooth · to be paired | Receiver with the first firmware, never used with this phone | geosit pairs it (Pairing …). If the phone asks for confirmation, tap Pair. Then it connects. |
| Classic Bluetooth · paired | Already paired with the phone | It connects right away. Touching and holding it you forget it (Forget): to use it again it will have to be paired again. |
The command at the top right changes with the state:
| Button | When |
|---|---|
| Search again | The search is over: it starts it again. |
| Stop | During the search: it stops it. |
| Cancel | During the connection |
| Disconnect | With a receiver connected, or lost and reconnecting |
This instrument is not in the license
A license can be valid only for certain receivers. Usually they are the first MS2 units that connect, one per phone: the first connection binds the receiver to the code, with nothing to type. If you tap a different receiver when all the places are taken, geosit says so and does not connect: ask the reseller to unbind the old receiver or to add a place.
If the connection drops
If the receiver switches off, moves away or stays silent for more than ten seconds, geosit considers it lost and tries again by itself: on the Home you read Reconnecting… and in the capsule the solution becomes …. When it drops, three falling notes sound and the phone vibrates, because whoever looks at the pole does not see the screen. A measurement in progress is cancelled with a message: repeat it when the receiver is back. Static instead goes on: the raw data stays in the same file. The kinematic and stop & go raw data also resume in the same file, and the automatic point restarts by itself.
Without a connected receiver (off, lost or still connecting) geosit never shows the measure button, nor satellites, solution and position: the map only shows the points.
Receiver status
From the status panel (tap on satellites or solution, then on a row) Receiver status opens.
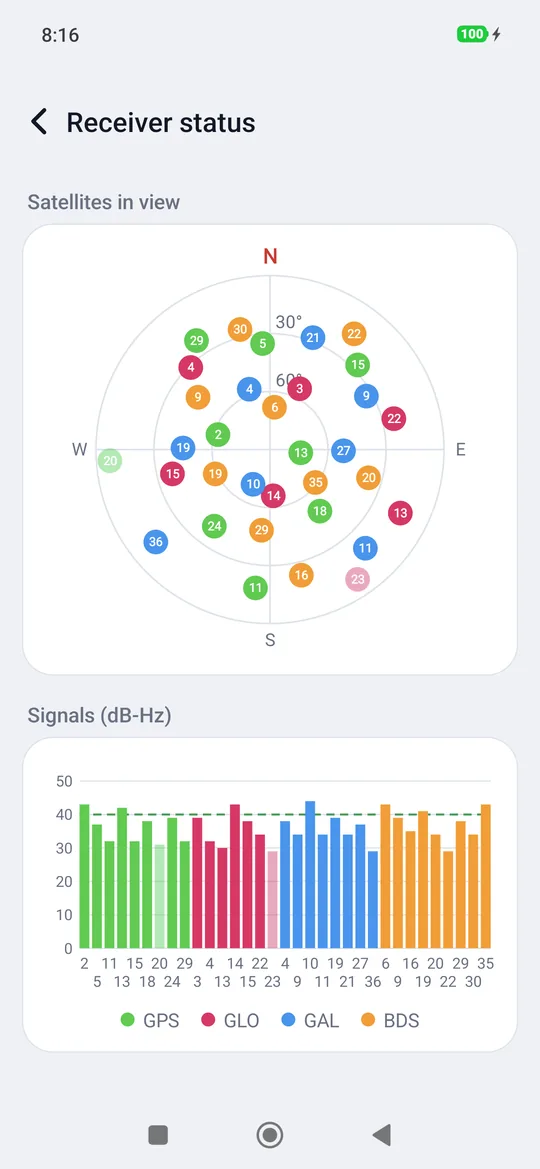
- The sky: each dot is a satellite, in its direction (N at the top) and at its elevation (the zenith in the center, the horizon on the edge). The color tells the constellation; the light dots are satellites seen but not used.
- Signals (dB-Hz): one bar per satellite, with the signal strength. The dashed line marks 40 dB-Hz: bars below 30 are weak signals, typical under a dense canopy.
- The constellations: GPS, GLO (GLONASS), GAL (Galileo), BDS (BeiDou).
In the woods
Under the canopy the signals drop and the FIX comes more slowly or is lost. Moving a few meters towards a clearing, raising the pole or waiting a minute standing still helps a lot. The signal chart shows you right away whether the sky is too closed.
NTRIP corrections
For the FIX the receiver needs the corrections from a network of permanent stations. geosit takes them from an NTRIP caster via the Internet and passes them to the receiver. They are set in Settings → NTRIP corrections.
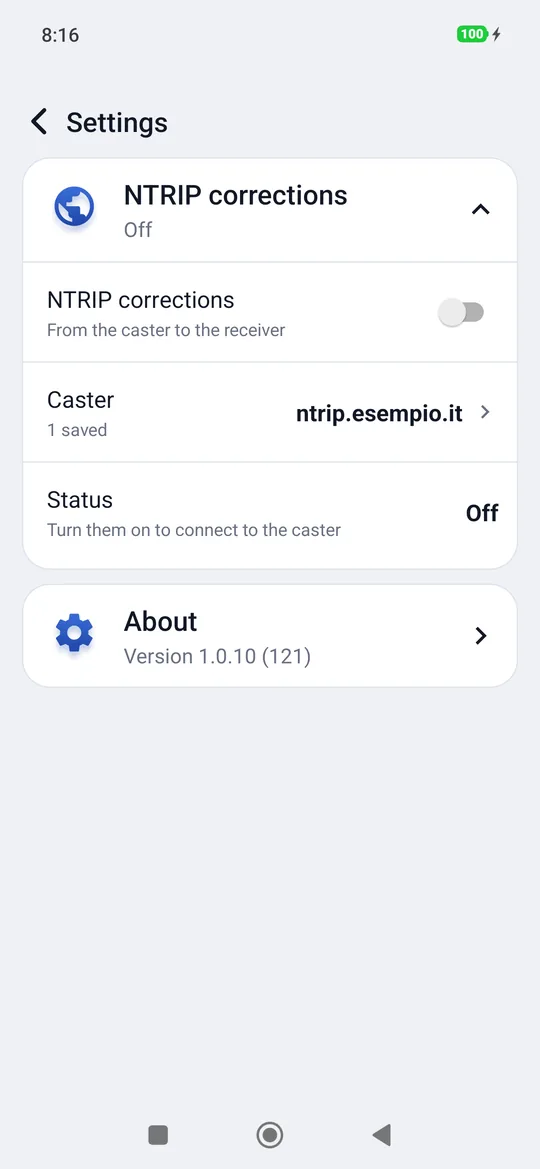
| Item | What it does |
|---|---|
| NTRIP corrections | The switch: turns the corrections on and off. |
| Caster | The caster in use, chosen among the saved ones (None saved, 1 saved…). |
| Status | What is happening, live (see below). |
Adding a caster
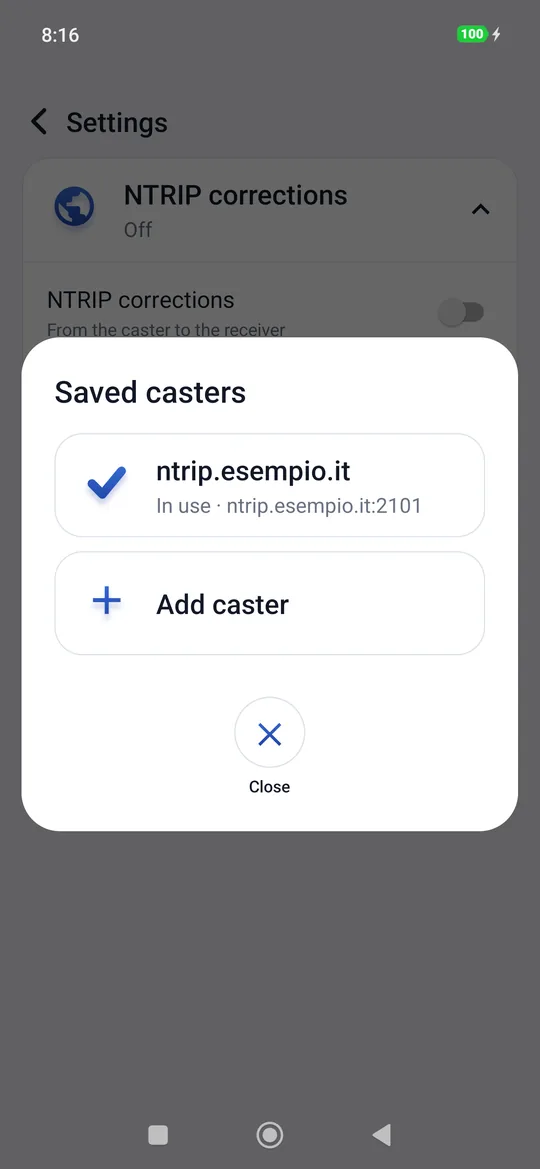
- Tap Caster → Add caster.
- Write the address of the caster. You can also write the port:
caster.example.com:2101. - The caster card opens: fill in the fields, which are saved by themselves, and tap Use this; if it is already the one in use, Close.
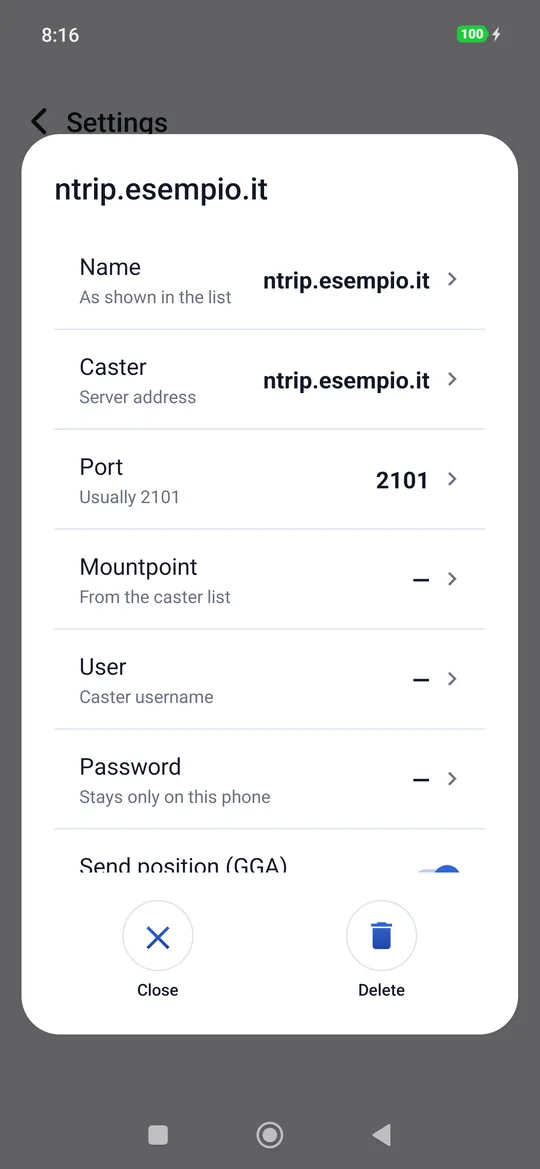
| Field | What to write |
|---|---|
| Name | How it appears in the list (by default the address). |
| Caster | The server address. |
| Port | Usually 2101. |
| Mountpoint | When you tap it, geosit reads the list from the caster and offers it; if the caster does not give it, you type it by hand (Type it). |
| User and Password | The network credentials. The password stays only on this phone. |
| Send position (GGA) | To turn on for VRS networks and for “nearest” mountpoints, which want to know where you are. |
| NTRIP 2.0 | On: protocol 2.0. Off: version 1.0, for older casters. |
You can save several casters (for example the regional network and another one as a backup) and choose the one in use from the list. Delete in the card removes a caster.
The status of the corrections
| Status | What it means |
|---|---|
| Off | The switch is off. |
| Waiting | Something is missing: Choose a caster, The mountpoint is missing… or the receiver is not connected (Corrections start with the receiver connected). |
| In progress | Connecting to the caster. |
| Connected | The corrections are arriving: in the panel you read the mountpoint, the data received and for how many seconds. |
| Error | No network or a caster that does not answer: geosit retries on its own. |
| Refused | Wrong credentials or mountpoint: Fix the settings. |
With the demo receiver
The corrections do not start with the demo receiver: they are only for a real GNSS receiver.
The demo receiver
At the bottom of the receiver list there is always Demo receiver (Simulated position): a simulated position, in FIX, that stays where you put it. It is for trying geosit without an instrument: survey, stakeout, the Pro, GIS and Scene packages, export.
- You choose it by tapping it, like a real receiver.
- The capsule shows satellites and solution as with an MS2.
- NTRIP corrections do not start and the raw file is not recorded.
- To move it, in Survey press and hold on the map and choose Move the position here; holding on a point puts it exactly on the point. In Stakeout the long press moves it at once: that way you try arriving on the target.
- The spot is kept when you close the app; the first time it is in Udine, Piazza Primo Maggio.
For trying, not for surveying
The demo receiver stays where you put it: what it measures is not where you are. To survey for real, connect your MS2.
Points from the phone's GPS
geosit no longer measures with the phone's GPS. Points measured that way in earlier versions stay as they were, with the GPS solution.