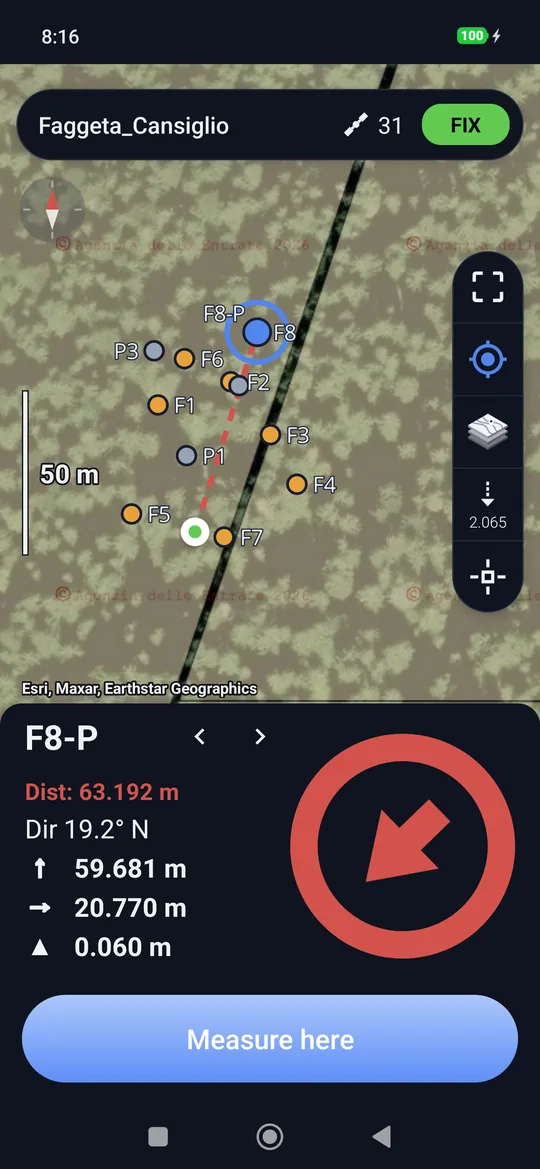
Stakeout
Stakeout takes you to the location of a point you already know: a tree to find again, a parcel vertex that came from the office, a stake to put back. geosit guides you with the map, an arrow, the distance and sounds; in the last metre a bubble appears that centres on the point.
Opening it
Stakeout opens from a point, with Stake out:
Stake out appears only with the receiver connected. With the back button you return to where you were.
The screen
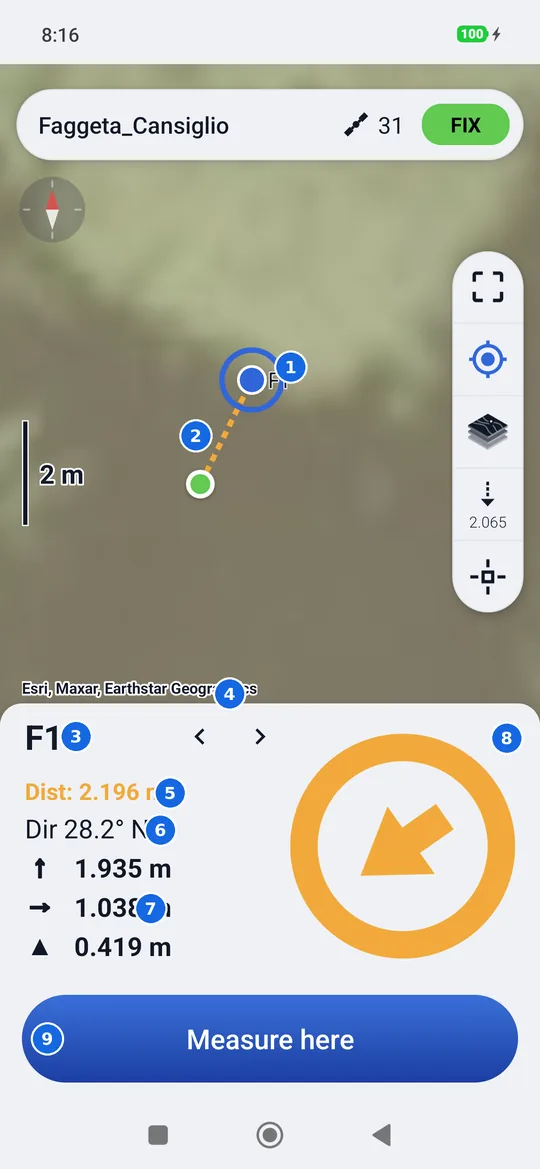
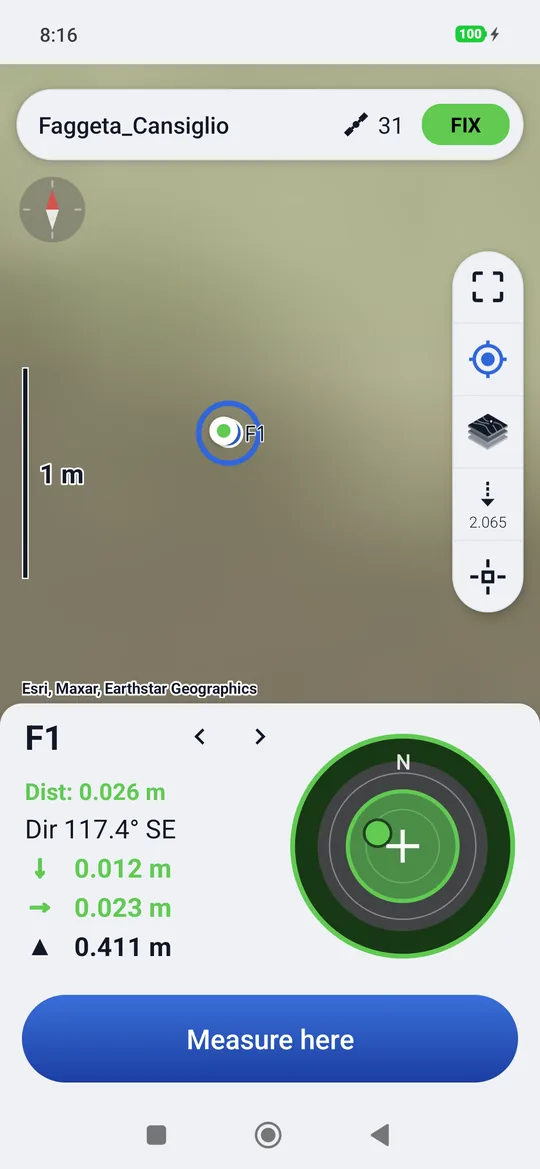
- The point to reach, circled.
- The dashed line from your position to the point, in the colour of the phase.
- The name of the point.
- ‹ ›: the previous or next point, without leaving. Imported points and those entered manually come first, then the measured ones.
- Dist: the horizontal distance, in the colour of the phase.
- Dir: the direction of the point in degrees, with the abbreviation (N, NE, E…).
- How far to move: ↑ or ↓ towards north or south, → or ← towards east or west, ▲ or ▼ how much higher or lower the point is. Below 2.5 cm (5 cm for the elevation) the value turns green. If the point has no elevation (for example imported without one), there is a dash instead of the height difference.
- The ring: from far away an arrow that shows the way, in the last metre the bubble.
- Measure here: measures a point where you are.
The map always shows your position and the point together, even when it is kilometres away, and zooms in by itself as you get closer (from 100 metres down), so the point always stays visible and precise. The panel at the bottom always stays open. The position button makes the map turn with your heading, and the compass turns it back to north: see Rotating the map.
The phases of the approach
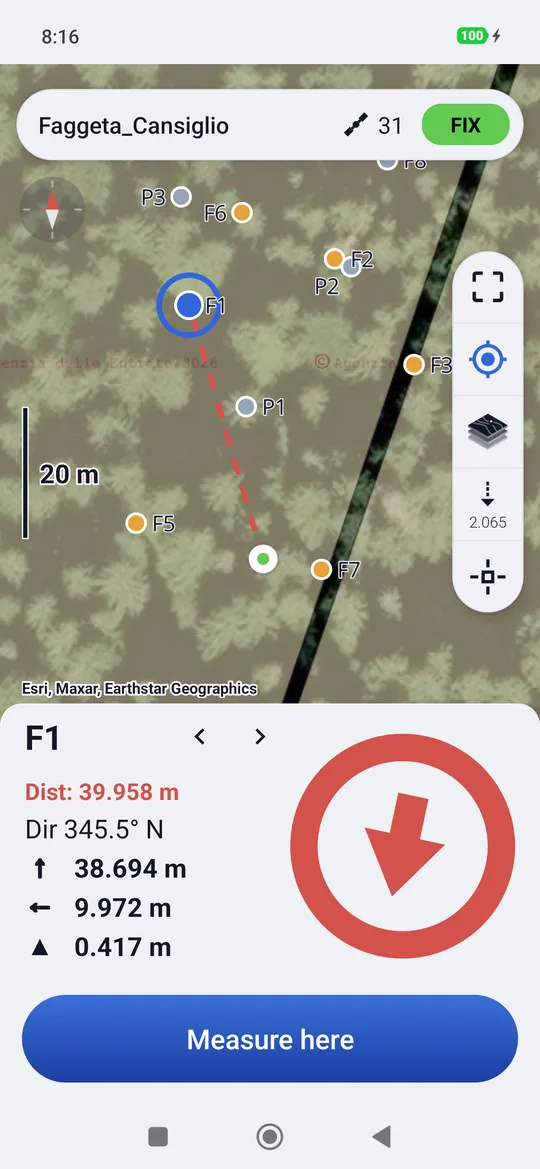
The colour of the distance, of the line and of the ring, and the sound change together:
| Phase | When | Colour | Sound |
|---|---|---|---|
| Far | Beyond the approach distance (5 m by default) | red | none |
| Approaching | Between the approach distance and 1 metre | orange | a beep every 1.2 seconds |
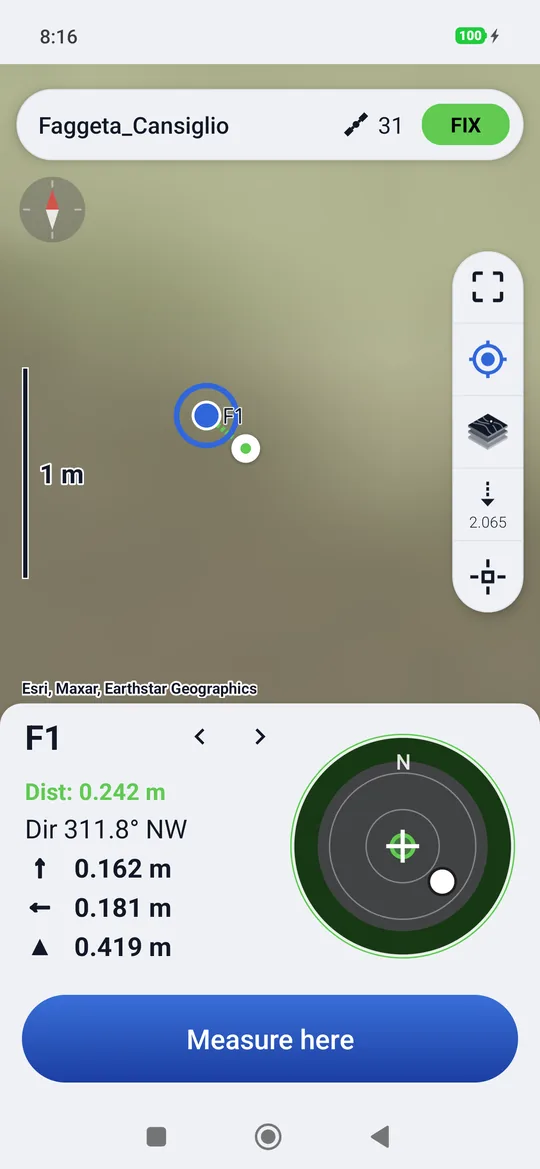
| Near | Under one metre | green, the bubble appears | fast beep |
| On the point | Within the tolerance (5 cm by default) | green | a three-note arpeggio, and the phone vibrates |
Tolerance, approach distance and sounds are changed in Settings → Stakeout.
The arrow and the compass
From far away the ring contains an arrow that shows where to go relative to how you hold the phone: geosit uses the phone's compass. Hold the phone flat, in front of you, and walk where the arrow points. If the compass is disturbed (near metal, a car) the arrow can be wrong: trust the distance and the ↑ → offsets in metres.
Calibrating the compass
If the arrow spins aimlessly, move the phone drawing a figure eight in the air for a few seconds: the compass recalibrates.
The bubble
Under one metre the arrow gives way to the bubble: the centre is the point to reach, the white dot is the pole, seen from above, with north (N) always at the top: the bubble does not turn with the phone. Walk so that the dot reaches the centre. The edge of the bubble represents a fixed distance that narrows step by step (1 m, 50 cm, 20 cm…). Within the tolerance the bubble turns completely green.
On the point, a tap on the bubble measures the point: it is the same as Measure here.
Measuring the staked-out point
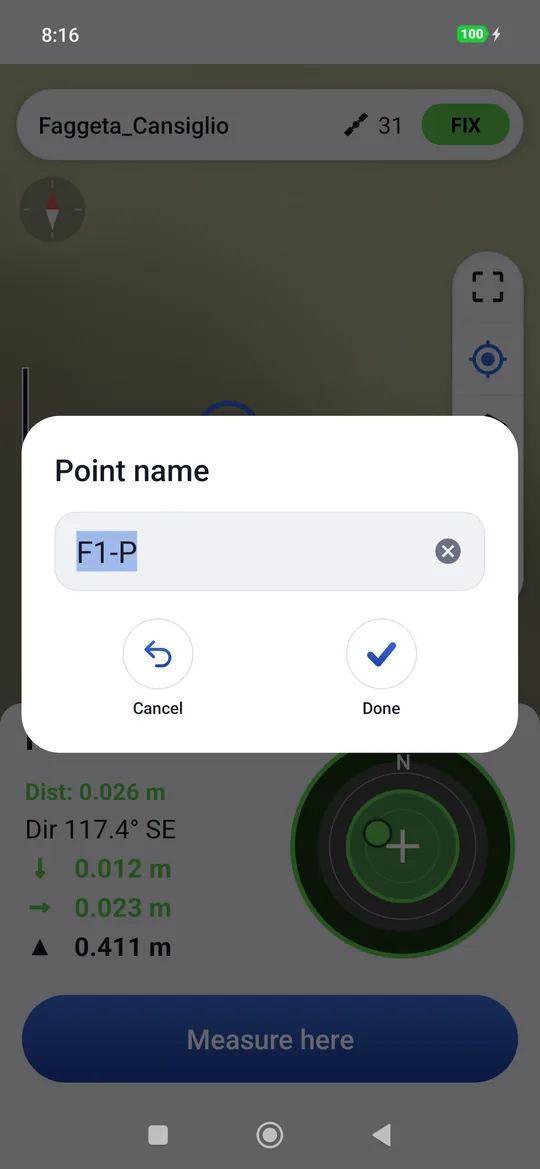
Measure here (or the tap on the bubble) asks for the Point name: geosit suggests the name
of the point being staked out with -P at the end (for example F1-P), and you can change it. Then the
measurement proceeds as in the survey, with the same questions if the solution is not FIX.
When the measurement is done, a check mark appears in the ring for two seconds and the new point goes into the project. Measure here works at any distance: it also serves to mark where you really are, when the exact point cannot be reached (a tree, a wall).
Moving to the next point
- › and ‹ scroll through the points without leaving;
- tapping a point on the map makes it the new target straight away, without a card;
- with the Pro package, the snap crosshair takes a point of a CAD drawing and makes it the target (Stake out): see CAD drawings and snap.
Staking out a line
With the Pro package you can also stake out a line: tap the line on the map. The target becomes the point of the line closest to you and follows you as you walk; the panel guides you there as for a point.
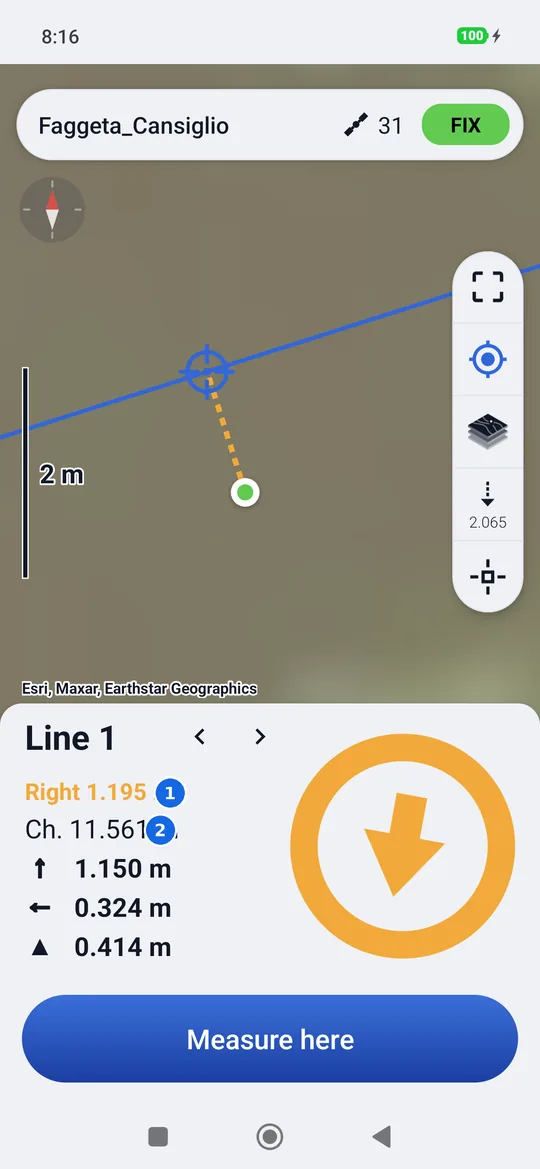
- The offset: how far you are from the line, Right or Left looking from the first vertex towards the last.
- The chainage (Ch.): the metres along the line, from the first vertex to the point closest to you.
- On the line, within the tolerance, the ring turns green as for a point; Measure here saves the point where you are.
- The target's height lies between those of the two nearby vertices, in proportion: the height difference tells you how much to dig or fill.
- Tapping a point, or › and ‹, takes you back to points.
At fixed intervals
Tapping the line lets you choose between To the line (the nearest point, as above) and At fixed intervals, as in Emlid Flow: type the interval in metres and, if needed, a side offset (positive to the right, negative to the left, in the direction of the line). The stakes start at the first vertex, one every interval, and the end of the line is always included.
- The target is the stake nearest to you; its name gives the chainage (Line 1 · 15.000 m).
- › and ‹ move to the next or previous stake.
- After Measure here you move on to the next stake by itself.
Without receiver
Without a receiver connected, stakeout does not guide: the panel disappears and the map shows only the points, with distance and area instead of the pole in the column.
At night or in the dark
With the dark theme the colours of the phases stay the same.